> ## Documentation Index
> Fetch the complete documentation index at: https://comfyart.org/llms.txt
> Use this file to discover all available pages before exploring further.
# Getting started
> Install ComfyArt, open the canvas and make your first image.
## Requirements
* A working [ComfyUI](https://github.com/comfyanonymous/ComfyUI) install with a GPU that can run the image model you pick.
* The model files for the features you want to use. See [Models](/guides/models). Qwen Image 2.1 alone is enough for generation, quick edit, edit text and expand.
## Install
```bash theme={null}
cd ComfyUI/custom_nodes
git clone https://github.com/jtydhr88/ComfyArt
```
Use the same Python environment that runs ComfyUI. Today this only adds `pypdfium2`, used for PDF uploads.
```bash theme={null}
pip install -r ComfyArt/requirements.txt
```
Open [http://127.0.0.1:8188/comfyart/](http://127.0.0.1:8188/comfyart/) in your browser.
The built page ships in `dist/`, so you do not need Node.js to use ComfyArt. Only if you change the frontend source in `src/`, rebuild it with `npm install && npm run build`.
## Your first image
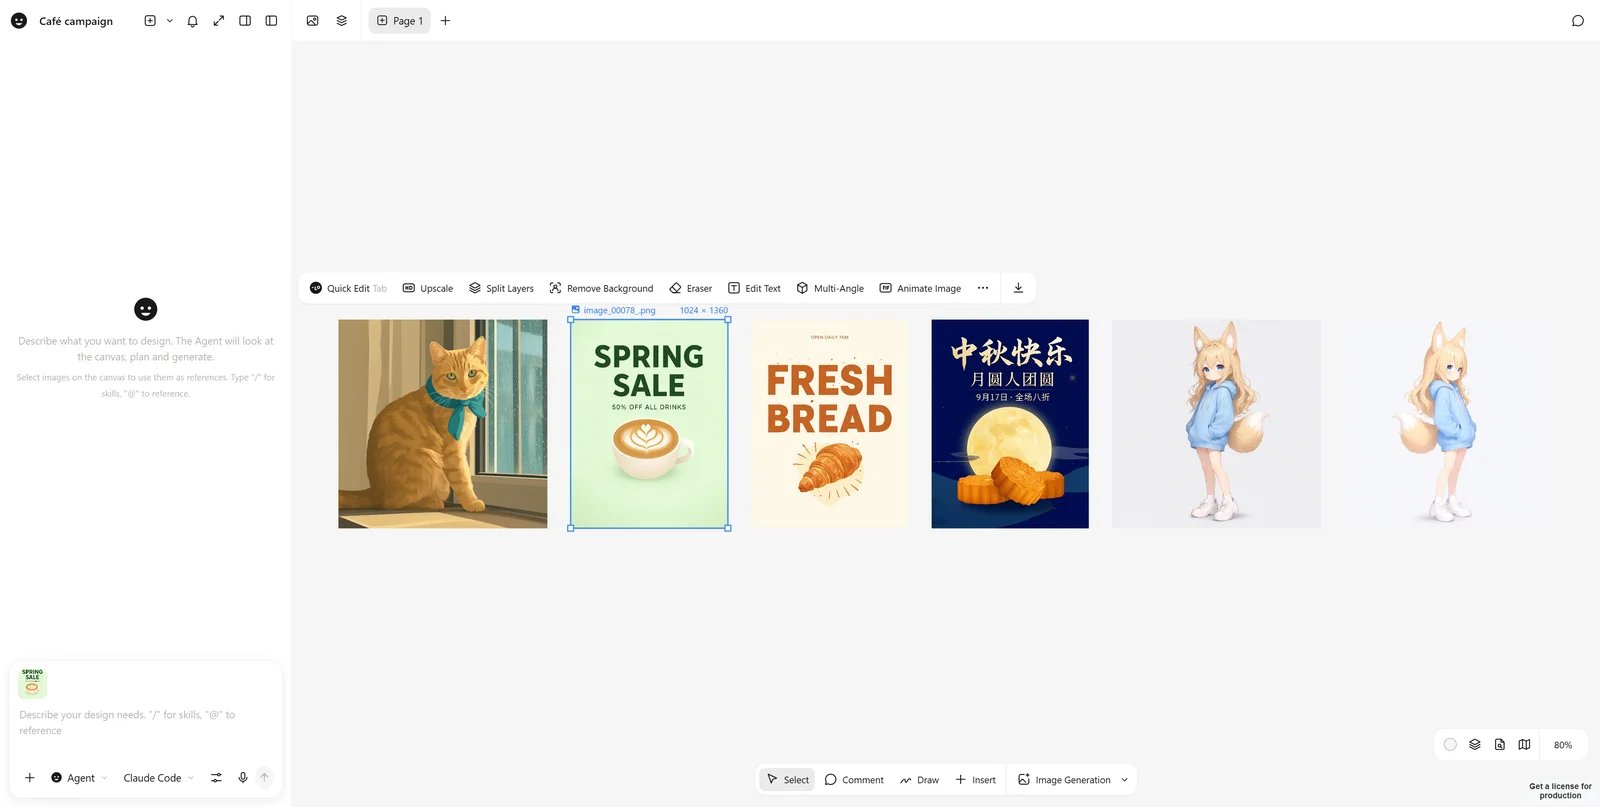 1. Click **Image Generation** in the bottom bar. A generator card appears on the canvas with a prompt box under it.
2. Describe the image. Put any text that should appear in the image in quotes, for example `the title "SUMMER DRINKS"`.
3. Pick a ratio, size and count, then press the arrow button. A progress ring runs around the card while ComfyUI works.
4. Select the result to open the image toolbar: quick edit, upscale, split layers, remove background, eraser, edit text, multi-angle, animate, and more under **⋯**.
## Projects and language
* Each project is a URL: `/comfyart/?project=`. Use the **Projects** button at the top left to switch, rename or create projects.
* Projects are saved in the ComfyUI user directory under `comfyart/projects/`, with snapshot history you can restore.
* The interface follows ComfyUI's language setting (English or Chinese).
## Next steps
References, color palettes, base images and video.
Turn on the agent and let it plan and build designs for you.
This documentation is built and hosted on [Mintlify](https://mintlify.com), a developer documentation platform.
1. Click **Image Generation** in the bottom bar. A generator card appears on the canvas with a prompt box under it.
2. Describe the image. Put any text that should appear in the image in quotes, for example `the title "SUMMER DRINKS"`.
3. Pick a ratio, size and count, then press the arrow button. A progress ring runs around the card while ComfyUI works.
4. Select the result to open the image toolbar: quick edit, upscale, split layers, remove background, eraser, edit text, multi-angle, animate, and more under **⋯**.
## Projects and language
* Each project is a URL: `/comfyart/?project=`. Use the **Projects** button at the top left to switch, rename or create projects.
* Projects are saved in the ComfyUI user directory under `comfyart/projects/`, with snapshot history you can restore.
* The interface follows ComfyUI's language setting (English or Chinese).
## Next steps
References, color palettes, base images and video.
Turn on the agent and let it plan and build designs for you.
This documentation is built and hosted on [Mintlify](https://mintlify.com), a developer documentation platform.